|
Building the Model Airways 1/16th Scale Sopwith Camel
A Plastic Modeler Takes Leave of His Senses
or
How I Learned to Stop Worrying and Love my X-ACTO
By Doug Robertson
I've been a plastic modeler for nearly my whole life and I've
built almost everything from airplanes to tanks to ships to space to sci-fi.
I've even built some of the old Revell sailing ships - I still have the U.S.S
Constitution on my shelf.
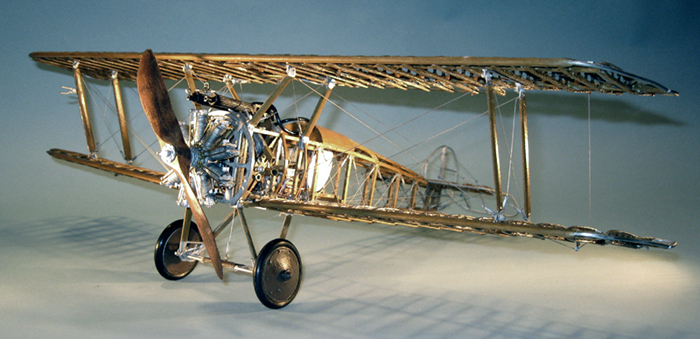
But one thing I've always wanted to build is a true museum
quality WWI bi-plane. One of those open frame wood and metal models that shows
all of the construction details of the original. So when Model-Expo made its Sopwith Camel kit available in
monthly installments, I decided the time was now and took the plunge.
I'm sure beer was also somehow involved in the decision.
Follow along as this plastic modeler learns to love basswood
and white metal.
The Kit
The kit from Model Airways ships in eight monthly
installments, each sub-kit containing everything you need to finish that
section. Kit 1 includes, according to Model Airways, "all the tools you'll need". Uh -
not really. The tools
that come with the kit are an X-ACTO (with one blade - You're not finishing this
with one blade.), a handheld pin drill with a nice set of
small bits, a small rat tail file, 3 sheets of sandpaper of various grades, a pair of diagonal cutters (not a particularly good
pair I might add),
one paint brush (one?),tweasers, plus wood glue and super glue. Each kit also
contains whatever paints will be required for that step. While they certainly
provide most of what you'll need and I suppose it would be technically possible
to complete the kit with just these tools; anyone who tries to build this thing
without a dremel and a wide assortment of bits is in for a difficult time.
Info on the kit is available on the Model Expo website:
www.modelexpo-online.com
Those who'd like to follow along while they point and laugh
can download a
pdf file of the kit instructions.
STEP 1 - Building the basic
fuselage structure
STEP 2 - Finishing the fuselage
STEP 3 - The top wing
STEP 4 - The bottom wing
STEP 5 - The empennage
STEP 6 - The landing gear
STEP 7 - Mounting the top wing
STEP 8 - The engine and propeller
|