Home
Meetings
Map & Directions
Membership
News and Events
Articles
Links
Contact Us
|
How I Work with Photo-etched Pieces (Cheap and Easy!)
By Scott Conner
KC AMPS / IPMS Great Plains
Introduction
Working with photo-etched pieces can be very nerve-racking. Making the bends, getting the
right angle, removing the leader, getting the bend straight, all go into making
photo-etch a worthwhile addition to your model. And let’s not forget the size of
some of the pieces! I remember the horrors once I decided to jump into the
photo-etched world. Cutting the pieces, holding the pieces, gluing the pieces,
finding the pieces I dropped on the floor, it was not a pleasant experience. But
with time, practice, and patience, I believe I have developed a good and cheap
method of working with photo-etched pieces with very nice results.
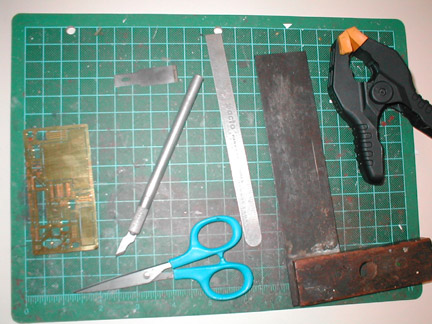
Equipment
I use the following items when working with photo-etch: an old metal square (you could use tile,
glass, acrylic, anything flat and strong), a small handheld spring clamp, an
exacto-knife with a number 16 blade, a chisel blade, a good pair of small
scissors (like Fiskars or Dura-sharp), and a self-healing mat (not required).
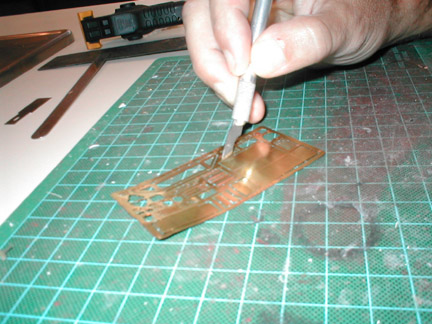
Removing the Pieces from the Tree
I have read the articles about how you place the photo-etch on a piece of glass or tile and exert
pressure on the leader with your Exacto Knife, but all that does when I tried it
was dull my knife. Instead, I place the PE piece on my self-healing pad. Using
my Exacto-knife with a #16 blade, exert pressure, but not right next to the
piece, give yourself a little room. Cut all the leaders and usually on the last
cut, your piece will be sticking out of your mat at an angle. If the piece is
bent, don’t worry, this will be corrected later.
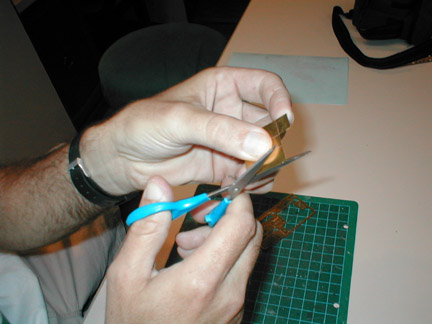
Cleaning up the Piece
One of the rules if try to follow is don’t ever use a file on the piece of photo-etch. All this does is
bend the piece in places where I don’t want it bent. Instead, I use a very small
and very sharp pair of scissors and using the edge of the piece as a guide, cut
the leader off. This should produce a nice, clean piece that does not need any
filing. It seems some manufactures can’t help but put the leaders in a place
where scissors can’t fit. In this case, I try to cut the leader off as close to
the piece as possible and correct any damage later.
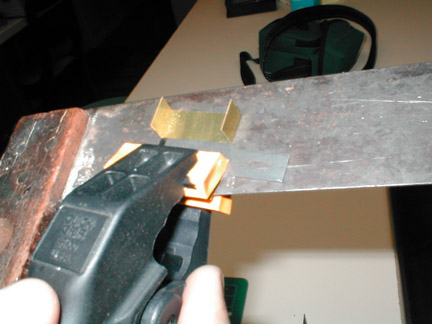
Bending the Piece
This is my favorite part. The idea for this came from Metals class in 8th grade. We had to make a
box from a sheet of metal, cut it, fold it and then spot-weld it. To fold it, we
had this big machine that we would slide the sheet metal under a clamp until it
was right where we wanted the fold. Then we would lift up a handle, which lifted
the base the piece of metal was resting on, and bend it at any angle we wanted.
The further we lifted the handle the more it would bend the metal. Now, how do I
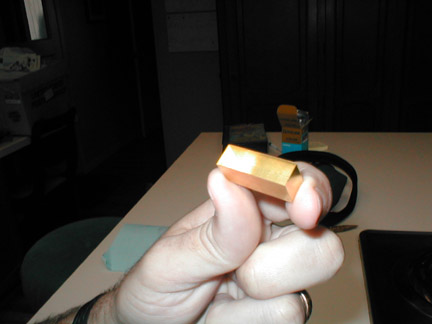
recreate this in miniature? My solution was to use a spring-loaded hand clamp
bought at a hardware store for about $3, an old square inherited from my
grandfather, a chisel blade, and a number 16 blade in an Exacto knife.
Place the piece on the square. Remember, the side with the line etched in it is the inside of the bend.
Place the chisel blade right on the line that you intend to bend. If it is a
ninety-degree bend you want, use the side of the blade. If the bend is more than
ninety degrees, use the sharp edge of the blade. Use the clamp to hold the blade
where you want it. I find it needs to be pretty close to the line to work
effectively. Work the number 16 blade under the part not under the clamp and
push it right up to the line. Using one motion, lift the handle on the Exacto
knife, using the tip of the blade as a pivot point. If it is a ninety-degree
bend, the knife will stop when it reaches the side of the chisel blade. I find I
can then run the blade along the edge of the chisel blade and smooth out any
imperfections and insure a smooth crease. If it is more or less than a
ninety-degree bend, stop where you think you need to stop. Unclamp it and check
your bend. Pretty simple, eh?
If the piece has more bends, repeat the process where needed. Of course, plan ahead on which bends
need to be done first so the next bend does not destroy the bend just made.
Sometimes the fold is longer than the chisel blade. I then use my handy metal ruler instead of the
chisel blade and use more clamps if needed.
Correcting Mistakes
These are ways to correct mistakes that might have occurred like the fold was not done right, the
piece was damaged during removal, or sometimes when there is a long fold, the
fold might not be even. If the fold is wrong, then take the piece and place it
back on the square, put the blade on top of it and smash is back flat with the
clamp. Move the clamp around a bit, and smash again. Sometimes I wiggly the
piece around under the blade to smooth it out. This is the same method I use to
correct damage done to a piece while removing it from the tree.
Sometimes the fold is not straight on long pieces due to the size of the piece and the size to the
number 16 blade. You get kind of a wrinkly fold. When this happens, remove the
piece, switch the piece so the part under the blade is know up and the part you
bent up is under the blade and smash the wrinkles out. I sometimes move the
clamp around to make sure you get all the parts straight. Crease the edge with
the Exacto knife to smooth out the fold, too. Remove the part and check it to
see your perfect part! Attaching the part
Of course, most the time, you will use superglue of whatever viscosity you choose to attach the
part. This is your only choice on resin pieces and metal to metal attachments. I
place a small drop on a butter container lid and dip into it with a small wire.
Place the glue where you want it, pick up the piece with a pair of tweezers and
plop it right where you want it. Recently, I have been using regular plastic
cement to attach tricky parts. Place a dab of regular ‘ol Testor plastic cement
where the piece is to be attached. Let it soften a few moments and place the
photo-etched piece in place. This gives you a little "wiggle" room to work with.
This bond is not as strong as superglue, but I have found it to be good enough
for a lot of applications. Nothing worse than prying off a piece of photo-etch
held on with superglue because it is at the wrong angle or place. First, you
will probably damage the piece. Secondly, the piece will probably fly off into
the twilight zone never to be found again.
Conclusion
There you have it. An easy, affordable, way to work with photo-etch. No special tools required. Give
it a try and see what you think!
|