|
Creating 3D photos
Creating 3D images of your models with Photoshop Elements.
by Doug Robertson
Great Plains IPMS
Presumably all of you have a pair of these around somewhere:
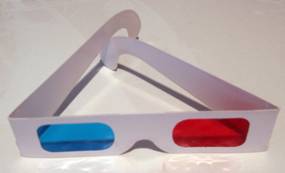
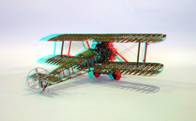
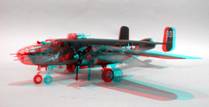
Those red/blue glasses used for viewing printed 3d images like this:
Well, I’m going to show you how to create images like that using your digital camera and Photoshop Elements 11. While my examples are specifically for Photoshop, the process should be adaptable to any photo manipulation software with similar capabilities.
First you need to take 2 images of your model from slightly different angles. Although I have done this successfully using a hand help camera, you’ll get better results with a tripod. When I’m taking photos, I just setup a card table and cover it and the wall behind with a large roll of blue paper I obtained from a photo supply store, but you can use any location with adequate lighting. Take one photo then move the camera about 3” to the right and take another. I’ve experimented with various degrees of separation between the photos and generally 3” (which is about the same as the distance between your own pupils) seems to work the best. If you are photographing a large model and need to place the camera more than a few feet away to get the whole subject in the frame, then you may need to use a greater separation between the two frames to get any depth in the finished photo. Conversely, if you’re taking a close-up shot, use a smaller separation. Make sure that the subject does not fill the entire frame. You must leave some empty space around the subject to allow for later manipulation. You may want to slightly rotate the camera after you shift it in order to re-center the subject in the frame, but I’ve tried this both ways and it really has no effect on the final image provided there is enough empty space around the model to allow the final image to be cropped.
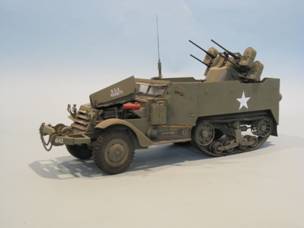
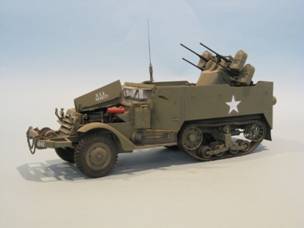
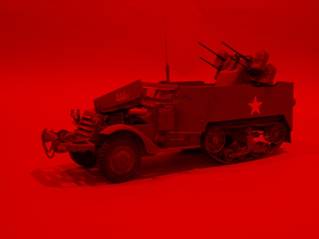
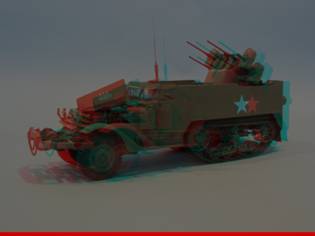
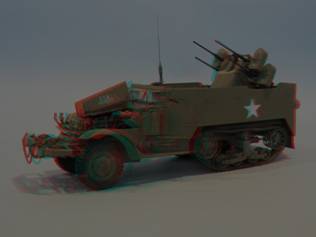
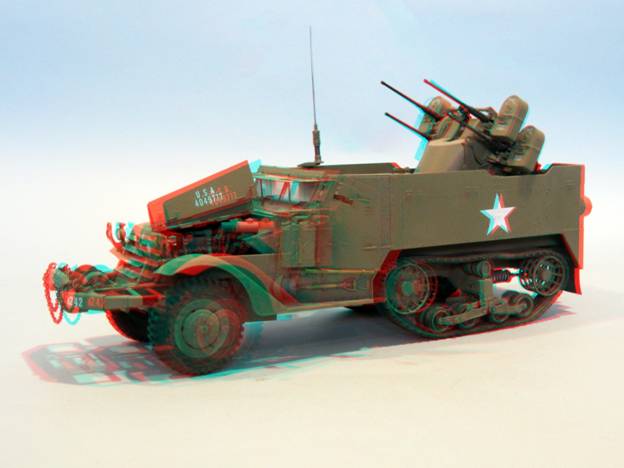
Here are the two images used to create one of the samples above. The model is Trumpeter’s 1/16th scale M16 Halftrack. These photos were taken from about 3 ft. away with the camera being shifted 3” between photos.
Next transfer the images to your computer and open them in Elements. I always open the left image first since that will cause it to be on the left. Make sure that Elements is set to Expert Mode.
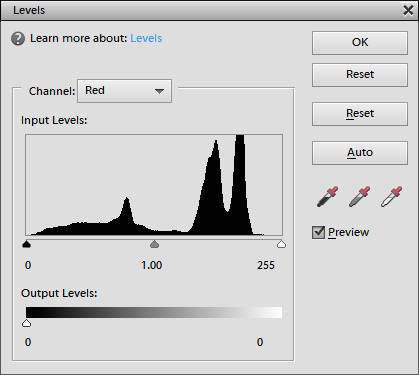
Select the “left” photo. If you look at your 3d glasses, you’ll see that the left lens is red. We need to filter this image so that it will be visible through the left lens and not the right one. To do this we need to remove the blue and green from the image leaving only the red information. From the menu bar select “Enhance”, “Adjust Lighting”, then “Levels…” to open the Levels dialog
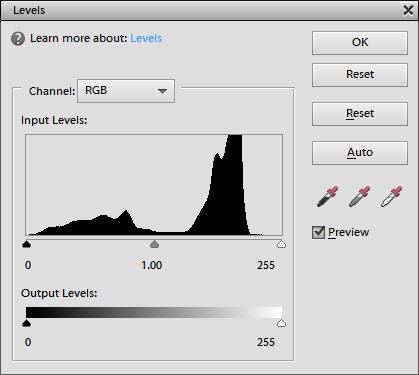
From here use the Channel: dropdown box and select “Green”. Now on the “Output Levels:” slider, grab the white arrow and move it all the way left to 0. This will remove all of the green from the image.
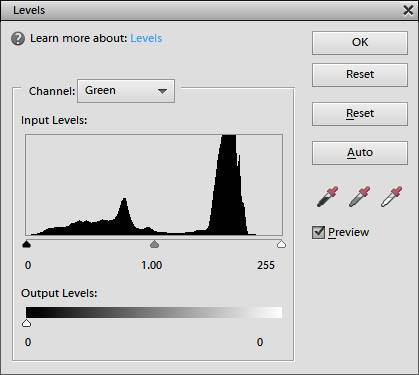
Now use the dropdown box again to select “Blue” and once again set the output level to 0. This will remove all of the blue information from the image. Click “OK” to close the dialog box. The left image has now been filtered to contain just the red information from the original photo.
If you look at this image through your 3d glasses it will be visible through the left lens and almost completely invisible through the right one.
Now select the right image. Again select “Enhance”, “Adjust Lighting”, and “Levels…” This time select “Red” in the “Channel:” dropdown box and set the Output Level to 0.
Click OK to close the box. You now have a right-side image with all of the red removed.

When combined, the result will contain all of the original color information with the red in the left image and the green and blue in the right image. In theory this allows for full color 3d images. In practice, this can sometimes result in some weird artifacts when the brain tries to recombine the images. This is most apparent with anything red as it will only be visible in one eye. An example in this image is the oil tank under the hood. Some subjects will work better if converted to monochrome first. I’ll talk about how to do that later.
Now we need to combine the two images into a single one. With the right image still selected, on the menu bar choose “Select” then “All”. Then choose “Edit” and “Copy”.
Now select the left image and use the menu to choose “Edit” then “Paste”. Open the “Layers” window if it is not already visible. This can be done from the Menu by selecting “Layers” under “Window”. Make sure Layer 1 is highlighted and use the “Opacity” dropdown to set the layer opacity to 50%
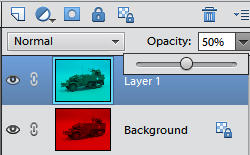
You should now see the combined image
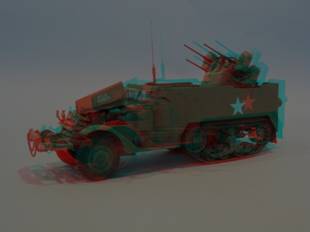
Now select the Move tool from the toolbar and use it to adjust the location of the overlayed image. You can drag the image using the mouse or use the arrow keys on the keyboard for more precise control. You’ll notice that there is a vertical offset between the two images in the above photo. Adjusting the overlay eliminates this
Now we can set the screen plane which will determine whether the image projects out of the screen or recedes into in when viewed through the glasses. You can set this point by shifting the overlayed image left or right. As you move the overlay, you will notice that there is a point at which the two images coincide. This point marks the place on the image which will be at the depth of the display screen. Everything in front of this point will project out of the display while everything behind will recede into it.
For instance in this image I’ve set the coincidence point at the corner of the front bumper which will cause the entire image to recede into the display when viewed though the glasses.
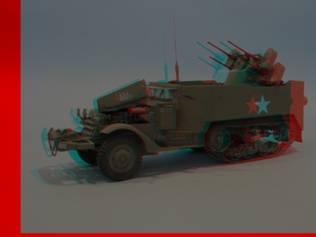
Whereas in the image below, I’ve set the merge point to about where the back corner of the fighting compartment would be. This will cause the whole image to pop out of the display screen.
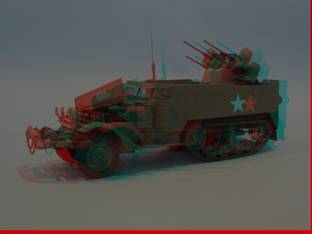
You can set this point anywhere on the image that you like. I’ve used the antenna to set the screen plane in this image which will cause part of the image to project in front of the display and part of it to recede.

You can use the glasses during this step to help with this positioning and to obtain a final result that you like.
You’ll notice that moving the overlay around will result in a fringe of one color or the other. This is why you need to leave some dead space around the subject when you take the original images so that you’ll be able to crop this out of the final image.
Once you have the 3d effect you like it’s time to merge the layers and crop the result. From the menu select “Layer” then “Flatten image”. Now use the “Rectangular Marquee” tool to select the final image to be cropped. You can freehand the box, but I prefer to use the Tool Options and set a Fixed Ration of 4:3 (or 16:9 for wide screen) using the “Aspect:” dropdown box.
Note than you can adjust the exact positioning of the selection box using the arrow keys. Once you have the box where you want it, use the menu and choose “Image” then “Crop”.
Now you’ll probably want to brighten the result. I usually get excellent results by just choosing “Enhance” then “Auto Contract” from the menu, but feel free to experiment with any of the other options such as “Brightness/Contrast” or “Levels” under “Adjust Lighting”.
Once you have the image the way you like it, use “Save As…” from the “File” menu to save the final image using a new filename. Using Save As leaves the original file intact in case you want to use it again in the future.
Creating monochrome images:
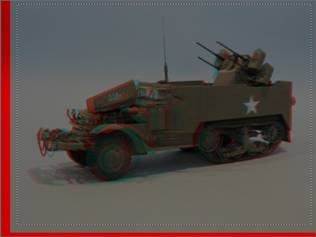
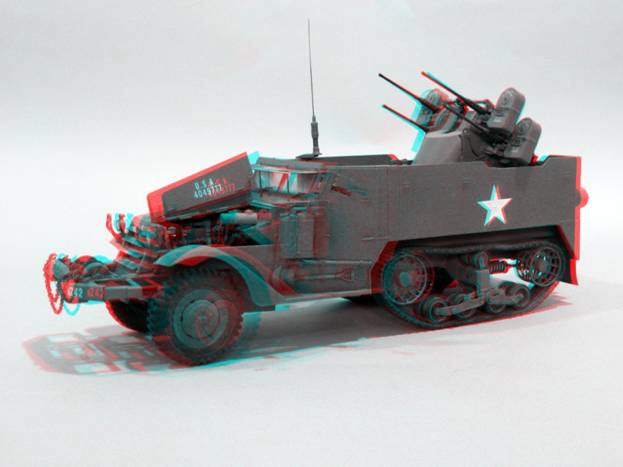
I mentioned earlier that some subjects may look odd if you attempt to render them in full color using this method. The problem can be seen in the image above with the red tank in the engine compartment. Most of the image looks fine, but the tank is much brighter in the left eye than the right and all of the color is coming through one eye which can confuse the brain and cause it to look very odd. For subjects like this, you may be better off creating a monochrome image. This is easily done by adding a step right after you load the images into Photoshop. For both the left and the right images, use “Enhance”, “Adjust Color”, “Remove Color” to convert each one into a monochrome image before you doing anything else. The rest of the process remains the same. The final result will be like the image below.
|